Analog Photography: The Beginner’s Guide to Film Cameras (2025)
Film photography, much like the tenacious Black Knight from Monty Python’s The Holy Grail, defiantly declares, "It’s just a flesh wound!" even as digital photography enters its fourth decade. Far from being relegated to the dusty archives of history, film continues its unwavering hold, proving that its unique charm and tangible allure are truly immortal. Indeed, one could argue that film photography will never truly perish. Envision a post-apocalyptic future, long after the digital grid has crumbled and our vast collections of digital images have vanished; someone, somewhere, will inevitably unearth a classic Nikon FM2T, load it with a roll of expired Tri-X, and continue to document the world, one frame at a time.
For anyone feeling the pull of analog photography, whether you’re a complete novice or a seasoned photographer looking to rediscover the magic after years of digital dominance, fear not. Engaging with film is arguably easier and more rewarding than ever. This comprehensive guide, freshly updated in November 2025 (and regrettably, acknowledging the continuous rise in film prices), is designed to help you navigate the joys of film photography, from selecting your first camera to developing your precious negatives. By popular demand, we’ve also added a new section on mastering manual focus and an additional recommended development service, Memphis Film Lab.
First, Get a Film Camera
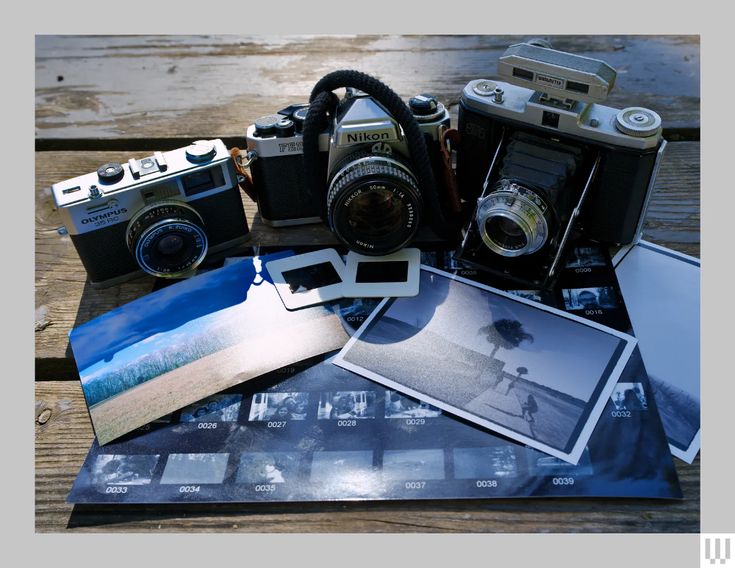
Your journey into analog photography begins with a film camera. This topic alone could fill an entire book, given the sheer variety available. However, for the sake of simplicity and getting started, we’ll focus on capable and reasonably priced 35mm options, ideal for first-time analog photographers.
There are hundreds, if not thousands, of film cameras out there, ranging from brand-new, quirky offerings by manufacturers like Lomography to venerable Leicas that still command many thousands of dollars even without a lens (which will set you back several more thousands). When embarking on the search for a used camera, particularly on platforms like eBay, it’s wise to consult guides on safe purchasing practices to ensure you get the best value.
For beginners, 35mm cameras offer a fantastic balance of accessibility, affordability, and a wide array of film choices. Here are some common types and what to look for:
- Single Lens Reflex (SLR) Cameras: These are often recommended for beginners due to their versatility and the "through-the-lens" viewing system, which shows you exactly what the lens sees. Many classic models from the 70s and 80s, like the Canon AE-1, Pentax K1000, Olympus OM-1, or the Nikon FM2T mentioned earlier, are incredibly robust, offer full manual control, and come at reasonable prices. They typically have a built-in light meter (though battery checks are crucial for older models) and a vast ecosystem of affordable lenses.
- Rangefinder Cameras: While often more expensive (especially models like the Leica M6), simpler rangefinders (e.g., Canonet QL17, Yashica Electro 35) can be compact and quiet, making them excellent for street photography. Focusing involves aligning two images in the viewfinder, which can take some getting used to.
- Point-and-Shoot Cameras: For ultimate simplicity, a 35mm point-and-shoot can be a great entry point. These automatic cameras handle exposure and focus, allowing you to concentrate solely on composition. While some cult classics can be pricey, many affordable options exist.
Medium and large format cameras also exist, some surprisingly cheap, others like the Hasselblad 501cm still selling for thousands. Future updates to this guide will delve deeper into these larger formats, but for now, sticking with 35mm simplifies the learning curve.
Get Some Film
Once your camera is in hand, it’s time to acquire film. If you’re old enough to remember shooting film, you’ll notice significant changes. Some beloved old film stocks are gone, replaced by a staggering number of new, boutique films, with varying degrees of quality. While I continually test as many as I can, for those just starting, I recommend sticking with the more established, bigger-name brands.
We’ll begin with color film, which primarily comes in two distinct categories: positive and negative.
Positive Film vs. Negative Film
- Positive Film (Slide Film): This type records the image precisely as you saw it when you pressed the shutter button. It’s renowned for producing incredibly rich, vibrant, and saturated colors, often with strong contrast. However, positive film is much less forgiving regarding exposure. You need to nail the exposure accurately, as there’s limited room for adjustment afterward. I generally avoid high-contrast scenes with positive film or employ graduated neutral-density filters to manage the dynamic range. When professionally developed, positive film is usually mounted as slides, perfect for projection or light table viewing.
- Negative Film (Color Print Film): In contrast, negative film records the inverse of what you observed. For black and white, this means blacks appear white and whites appear black on the negative, so when light shines through for printing, the dark areas block light, becoming lighter in the print, and vice versa. Color negative film follows a similar principle but often presents as a perplexing yellow-orange mess on the strip. Color negative film typically offers a softer look than positive film, characterized by lower contrast and a significantly higher dynamic range, making it more flexible for exposure errors.
Which should you choose? I highly recommend experimenting with both to discover which aesthetic resonates most with your photographic vision. Below are a few film recommendations tailored to different types of images you might wish to create.
Best Film for Landscapes
- Fujifilm Fujichrome Velvia 50 ($35 per roll): While undeniably expensive, I have yet to find another color-positive film that rivals Velvia’s aesthetic. Its color saturation is legendary, leaning towards reds and magentas, creating breathtakingly vibrant scenes. Its neutral gray balance ensures accurate colors in both shadows and highlights. The price makes it a film I use sparingly, but for epic wilderness and landscape shots, Velvia 50 is my go-to choice for its unparalleled richness and detail.
- Kodak Professional Ektachrome E100 Color Transparency Film ($22 per roll): E100 is a relatively new film for me, but after several rolls, I can attest to its distinct character. Unlike Velvia’s warmth, Ektachrome E100 offers neutral colors with a subtle green cast in the highlights, providing a more true-to-life, less stylized rendition of the scene. If you’re aiming for landscapes with a look that diverges from the Velvia-influenced imagery of the past five decades, E100 is an excellent recommendation.
- Kodak Professional Ektar 100 Color Negative Film ($15 per roll): Ektar 100 is a modern color negative film that comes remarkably close to replicating a digital aesthetic. It boasts extremely fine grain and colors that are strikingly similar to what my Sony digital sensor records: natural-looking hues with a tendency towards cooler tones. While it might not be my personal favorite for every scenario, its price point makes it an incredibly appealing and difficult-to-beat option for high-quality, fine-grained color negative work, especially when you need flexibility in exposure.
Best Film for Portraits
Portrait films are specifically formulated to render skin tones beautifully and naturally.
- Kodak Professional Portra 160 Color Negative Film ($14-15 per roll, often less in 5-packs): My former favorite, Fujifilm’s 160 Pro, has unfortunately been discontinued, leaving Kodak’s ever-popular Portra series as the reigning champion. At around $14-15 a roll, Portra 160 arguably offers the best value in film for portraiture. It excels at rendering skin tones faithfully, delivering a natural and pleasing palette most of the time. Its fine grain and soft contrast contribute to a smooth, flattering look. For situations demanding more speed in lower light, Kodak also offers a Portra 400-speed version (a versatile all-rounder) and even an 800-speed version. While the 800-speed might exhibit a bit too much grain for some color portraits, it’s an option if that particular aesthetic is what you desire or if lighting conditions are extremely challenging.
Best Black-and-White Films
The world of black-and-white film is vast, with a seemingly endless array of options, including reissued versions of iconic films from past eras. This list is, by necessity, somewhat biased, as "best" is purely subjective in this realm. I strongly encourage experimentation to discover your personal preferences.
- Kodak Professional Tri-X 400 Black and White Negative Film ($9-10 per roll): Launched in the 1940s and in continuous production ever since, Tri-X has evolved over the years, with its latest re-engineering in 2011 reducing its grain (hence the "TX" designation). Beloved by photographers as diverse as Sebastião Salgado, Vivian Maier, and Garry Winogrand, Tri-X is celebrated for its remarkable versatility, striking balance of grain, and contrast that imparts a distinctive look and texture. It delivers rich, deep black shadows, excellent contrast, and just enough grain to add character without being overwhelming. Tri-X is also remarkably straightforward to process if you choose to develop it yourself at home. If I were limited to shooting just one film, Tri-X would undoubtedly be my choice.
- Ilford HP5 Plus Black and White Negative Film ($11 per roll): Another incredibly versatile film, Ilford’s HP5 boasts a wide exposure latitude, making it perform exceptionally well in challenging and mixed lighting conditions. It exhibits less overall contrast compared to Tri-X, resulting in a smoother, more subtle tonal range. HP5 also pushes remarkably well (meaning you can underexpose it and over-develop it to gain effective speed), without becoming excessively grainy like Tri-X can when pushed hard. For a reliable, all-around film with a smooth, even tonality, HP5 Plus is an excellent selection.
- Kodak Professional T-Max P3200 Black and White Negative Film ($13-21 per roll): Let’s clarify one point upfront: Kodak describes this as a "multispeed" film, meaning there’s no strict requirement to shoot it at ISO 3200. I personally enjoy shooting it at ISO 800 and processing it for ISO 1600. It took me a few years to realize I was essentially making my T-Max look more like Tri-X, but the core idea is that T-Max P3200 is far more versatile than its nominal speed suggests. That said, I typically reach for this film when shooting in the evenings or in low-light night scenes where its true high-speed capabilities shine.
Developing Film
The days when a film development lab could be found on nearly every street corner, or in those ubiquitous little kiosks in parking lots, are largely behind us. However, the good news is that numerous professional labs now operate thriving mail-order businesses, offering quick turnaround times. Most of these labs are also happy to scan your negatives to digital files, though this service does add to the overall cost.
While hundreds of excellent labs exist, your best initial approach is to visit your nearest dedicated photography store and engage in a conversation with them. Building a relationship with your local photo shop can be incredibly beneficial; they’ll come to understand your preferences and can assist with specific requests like pushing or pulling film, and facilitate communication with the lab. Be sure to ask where they actually send their film for development, as many camera stores have begun outsourcing to larger online services (for instance, the store nearest me sends film to Nation’s Lab).
Here are a few reputable labs that I and many others have found to deliver excellent results:
- The Darkroom (California, USA)
- Indie Film Lab (Alabama, USA)
- Memphis Film Lab (Tennessee, USA) – Added by reader request, November 2025 update.
I understand what you might be thinking: $7 to $13 per roll for development costs! It’s no wonder digital photography gained such traction. However, there’s a compelling alternative: you can always develop the film yourself.
The process for developing black-and-white film at home is surprisingly accessible these days, thanks to readily available light-tight bags and chemical kits. I’m currently in the process of testing various home development tools, and future updates to this guide will include detailed recommendations for developing your own film. Color film, on the other hand, is significantly more complex, requiring precise temperature control and a wider array of chemicals. Having dabbled in self-developing color film in my poorer college days, I am now quite content to pay for professional color film development.
Most film photographers are drawn to the medium by a deep appreciation for the tangible – the physical print. Printing your images directly from film traditionally requires a darkroom equipped with an enlarger. If you have the space and resources to establish your own darkroom, I wholeheartedly encourage you to do so; it’s an incredibly rewarding experience.
The practical alternative, for those of us without the luxury of a dedicated darkroom, is to scan our film to digital files and then send them for professional printing. While I cherish the darkroom printing process, its current unavailability to me means I rely on "scanning" my film using a digital camera. For this purpose, I highly recommend the Valoi Easy35 Film-Scanning Kit ($245), which received an 8/10 rating and a WIRED Recommends badge. If you already own a DSLR or mirrorless digital camera, this method offers an excellent way to digitize your film images with impressive quality.
The Easy35 kit comprises a lightbox with adjustable brightness and temperature controls for its backlight, along with precisely designed slots on each side to feed your film through. Inside, a film holder ensures your film slides smoothly and aligns perfectly for capture. A series of interconnected tubes creates a light-tight tunnel between the film strip and your digital camera’s sensor. The result is consistently excellent digital images of your film, achieved with minimal effort and no recurring scanning costs beyond the initial investment.
Once your image is digitized, you can print it just like any other digital photograph. I personally use Printique and Mpix for my professional prints, both of which offer high-quality results. However, there are countless other reputable online printing services available. For more options and detailed recommendations, you can consult my "Best Online Printing Services" guide.
Learn to Shoot Film
Mastering film photography is an extensive journey, too broad to cover exhaustively in a single guide. Fortunately, many dedicated individuals and organizations have created exceptional resources. Here are some of our favorite avenues for deepening your understanding and skills in film photography:
- Online Tutorials and Blogs: Websites like YouTube, Reddit communities (r/analog, r/filmphotography), and various photography blogs offer a wealth of free information, tips, and inspiration. Look for specific tutorials on camera operation, film loading, exposure metering, and composition.
- Books on Film Photography: Invest in classic photography texts and modern guides. Books like Ansel Adams’ "The Camera," "The Negative," and "The Print" provide foundational knowledge applicable to both film and digital. More contemporary books often focus on specific film stocks or techniques.
- Workshops and Courses: Many local camera stores, art centers, and online platforms offer workshops specifically tailored to film photography. These can provide hands-on experience, personalized feedback, and a structured learning environment.
- Photography Communities: Join online forums or local photography clubs. Sharing your work, asking questions, and learning from others’ experiences is invaluable.
- Practice and Experimentation: The most crucial step is simply to shoot! Don’t be afraid to try different films, lighting conditions, and subjects. Keep a detailed log of your exposures, film types, and development settings to learn from your successes and mistakes.
Learn How to Manually Focus
Since the initial release of this guide, several readers have reached out seeking advice on manual focusing. They had enthusiastically acquired old SLR cameras and fast 50mm lenses, only to feel dissatisfied with their initial results. Their common query: "How do you focus fast enough not to miss the shot?"
Compared to the lightning-fast, highly advanced autofocus systems found in today’s mirrorless digital cameras, manual focusing is inherently slower and more challenging. It requires patience and precision. Consequently, especially when you’re first learning, you will miss shots. It’s an unavoidable part of the learning process. However, it’s worth remembering that virtually every iconic photograph taken before approximately 1995 (and countless exceptional images since) was created without the aid of autofocus. The skill is entirely learnable and incredibly rewarding.
Here are some tips that have greatly assisted me in mastering manual focusing:
- Understand Your Viewfinder Aids: Most manual focus SLRs have focusing aids in the center of the viewfinder.
- Split-Prism: This circle in the middle splits the image when out of focus. To achieve focus, you rotate the lens’s focus ring until the two halves of the image align perfectly.
- Microprism Collar: Surrounding the split-prism, this textured ring sparkles or shimmers when the image is out of focus and appears smooth and clear when in focus. Learn to recognize these visual cues.
- Zone Focusing/Hyperfocal Distance: This technique is invaluable for street photography or when you want maximum depth of field. By using the depth of field scale on your lens, you can pre-set your focus to a certain distance (e.g., 10 feet) and aperture (e.g., f/8) so that everything from a near point (e.g., 7 feet) to infinity is acceptably sharp. This eliminates the need to focus for every shot.
- Pre-Focusing and Anticipation: Rather than reacting to the moment, anticipate it. If you know your subject will pass a certain point, pre-focus on that spot. If you’re photographing a static scene, take your time to achieve critical focus.
- Practice, Practice, Practice: There’s no substitute for repetition. Take your camera out regularly, even without film, and practice focusing on various subjects at different distances and in different lighting conditions. Your muscle memory and visual acuity will improve significantly over time.
- Utilize Depth of Field: Don’t always shoot wide open (e.g., f/1.4, f/2.0). While fast lenses make focusing easier to see the fall-off, a shallower depth of field also makes precise focusing more critical. Stopping down to f/5.6 or f/8 will give you a greater margin for error and keep more of your scene in focus.
- Shoot in Good Light: Manual focusing is considerably easier in bright conditions where your viewfinder image is clear and crisp. In dim light, it becomes much harder to discern fine details.
- Trust Your Eyes, But Verify: Initially, you might second-guess your focus. Learn to trust what your eyes and your camera’s focusing aids tell you. With practice, you’ll develop an intuitive sense of when something is sharp.
- Don’t Overthink It: Sometimes, the best approach is to stop obsessing over perfect sharpness and embrace the intuitive process. Film photography often rewards a more deliberate, yet less clinical, approach.
Terms
Read our How to Buy a Camera guide for more details on these terms.
- Aperture: The opening in the lens that controls the amount of light entering the camera and the depth of field.
- Depth of Field (DoF): The range of distance in a photograph that appears acceptably sharp.
- Exposure: The amount of light that reaches the film, determined by aperture, shutter speed, and ISO.
- ISO (Film Speed): A measure of a film’s sensitivity to light. Higher ISOs are more sensitive but often have more grain.
- Light Meter: A device that measures the intensity of light and suggests appropriate exposure settings. Many film cameras have them built-in.
- Negative Film: Film that records inverted tones and colors, requiring printing to show the correct image. More forgiving with exposure.
- Positive Film (Slide Film): Film that records tones and colors as seen, producing slides. Less forgiving with exposure.
- Pushing Film: Deliberately underexposing film and then over-developing it to increase its effective ISO, often resulting in increased contrast and grain.
- Rangefinder Camera: A camera that uses a rangefinding mechanism to measure subject distance and achieve focus, often with a separate viewfinder.
- SLR (Single Lens Reflex) Camera: A camera that uses a mirror and prism system to allow the photographer to view the scene directly through the lens.
- Shutter Speed: The duration for which the camera’s shutter remains open, controlling the amount of light and the depiction of motion.
")